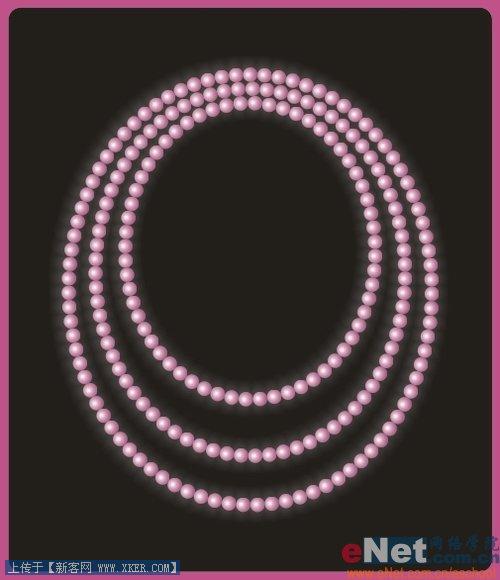
先看一下最终效果:
制作过程:
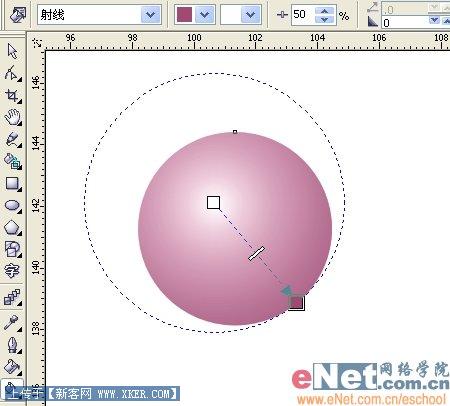
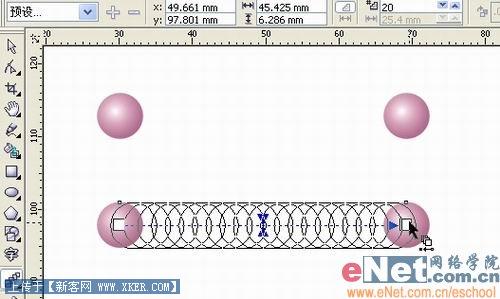
1、新建一个文件,选择椭圆工具,按住Ctrl键画出一个正圆。然后选择交互式填充工具,在椭圆上拉出一个从白到紫的射线渐变,这里紫色值为C: 20 M: 80 Y: 0 K: 20。完成一颗珍珠。
2、将椭圆轮廓设为无,Ctrl+D复制一个椭圆。选择交互式调和工具,在两个椭圆之间拉出一个调和。
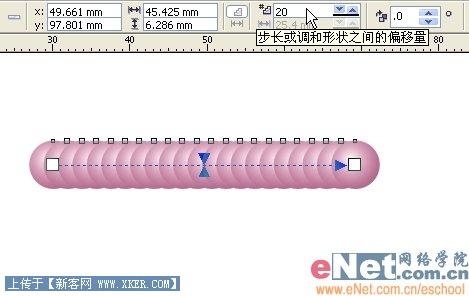
3、效果如下,步长值随后会根据新的路径进行调整。
4、用椭圆工具画一个椭圆作为新路径。用交互式调和工具选中珍珠,在属性栏上点“新路径”,鼠标会变成弯曲的箭头状。
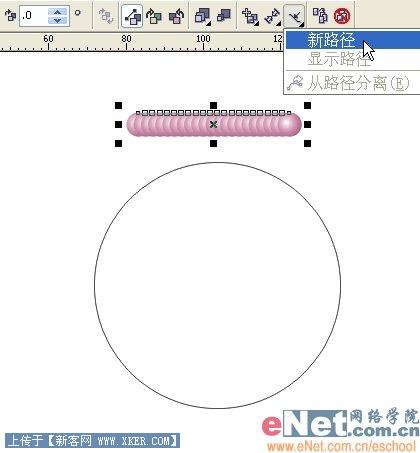
5、此时在椭圆上点一下,珍珠就以椭圆为新路径了,效果如下。
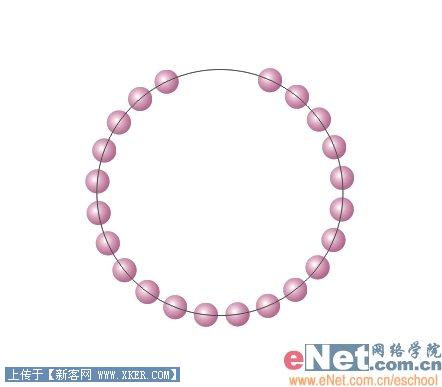
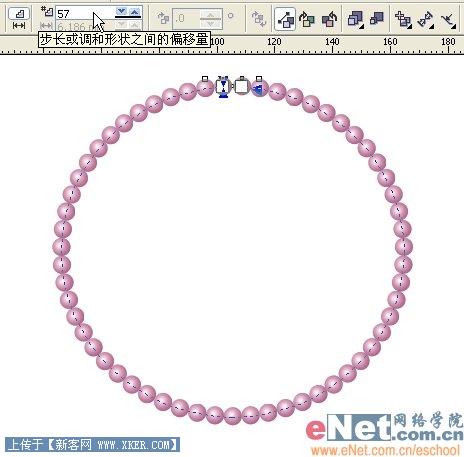
6、在属性栏上设置一个合适的步长值,直到珍珠布满整个圆环。
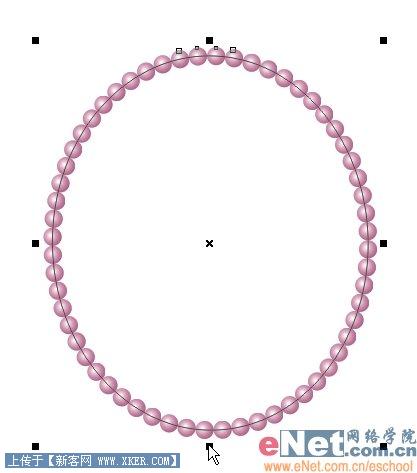
7、用挑选工具调整圆环至如下形状,就成了一个简单的项链。
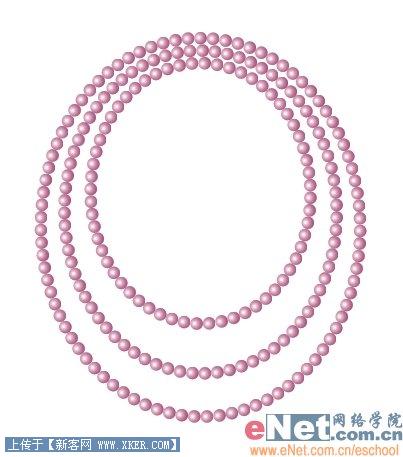
8、复制出另外两条,将它们的椭圆路径拉长一些并相应地增加珍珠的步长值,效果如下。
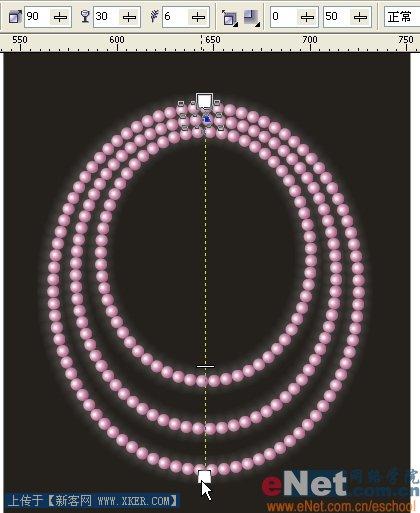
9、用矩形工具画一个大矩形,填充黑色,放在最下层作为背景。

10、选中三条珍珠项链并Ctrl+G群组。选择交互式阴影工具,在项链上拉出一个阴影,阴影颜色为白,具体设置如下。这就形成了珍珠的辉光。
最终效果: